
Are you struggling with parts that look good but fail during assembly? Choosing the wrong CNC machining surface finish leads to high costs and bad fitment.
A CNC machining surface finish defines the final texture of a part. It uses Ra (Roughness Average) to measure smoothness. Common choices include as-machined, bead blasting, and anodizing. Each option changes your total cost and part performance.
I have spent over 20 years on the shop floor at Ranglink. I see many engineers focus only on the numbers on a drawing. They forget the physical reality of the machine shop. This guide will bridge that gap to help you design better parts today.
What does surface roughness (Ra) mean in CNC machining?

The surface roughness value is often the first thing an engineer puts on a drawing. However, many people misunderstand what that number actually represents in a real-world manufacturing environment.
Ra is the arithmetic average of surface heights and depths across a given length. It is not a measurement of the single deepest scratch or highest peak. For critical sealing surfaces, Ra alone is often insufficient, and you must consider Rz to account for maximum profile height.
I once worked on a hydraulic valve body for a client. They requested a Ra 0.4 finish for a sealing surface. We hit the target, and the CMM¹ report was perfect. However, the unit leaked oil immediately. Why? Because the turning² process left a tiny, continuous spiral groove 3μm deep. Even though the “average” surface roughness³ was low, that groove acted like a micro-channel for oil. We switched to milling⁴ to create a cross-hatch pattern. The Ra remained 0.4, but the leak stopped. This taught me that texture direction is often more important than the number.
Understanding the Average vs. The Peak
Ra is an average. It can hide deep scratches that might ruin a vacuum seal or a high-pressure joint. If your part needs to hold a seal, you should ask your supplier about Rz. Rz measures the distance from the highest peak to the lowest valley. A part with a great Ra can still have a few “deep valleys” that cause failure.
Why Texture Direction Matters
Even if two parts have the same Ra 0.8, they will feel different. A turned part has circular lines. A milled part has parallel or curved lines. If you have a sliding fit, the direction of these lines dictates friction⁵ and wear⁶. Always specify the grain direction if the part moves against another surface.
The Cost of Over-Engineering
I often see clients ask for a Ra 0.2 mirror finish on decorative parts. I tell them that Ra 0.2 costs three times more than Ra 1.6. Your hand cannot feel the difference, and your eye can barely see it. Unless you are making medical implants⁷ or optical lenses, Ra 0.8 is usually more than enough for high-end aesthetics.
| Feature Type | Recommended Ra (μm) | Why? |
|---|---|---|
| Non-critical internal parts | 3.2 | Most cost-effective; visible tool marks. |
| External covers/panels | 0.8 – 1.6 | Good balance of look and cost. |
| Sliding/Bearing surfaces | 0.4 – 0.8 | Reduces friction and wear. |
| High-pressure seals | 0.1 – 0.4 | Prevents fluid or gas leakage. |
What are the most common surface finish options for metal parts?
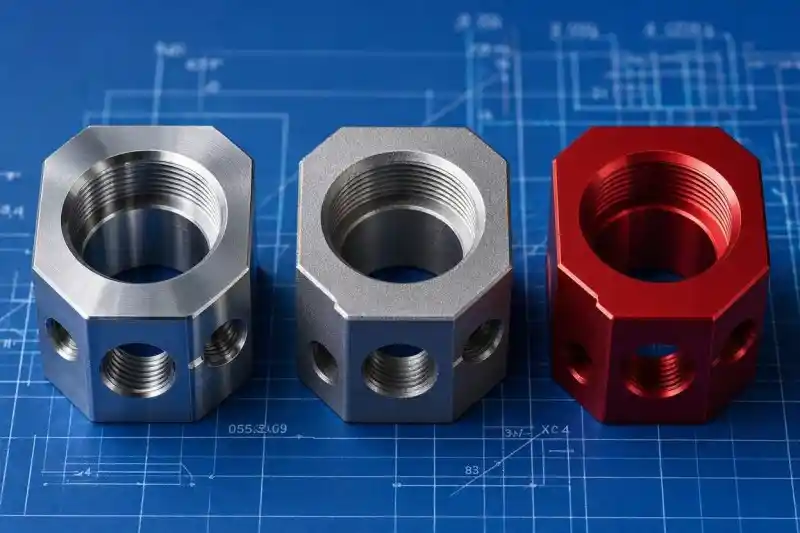
Choosing a finish is about more than just looks. It is about protection, fit, and how the material reacts to the environment over time.
The most common CNC finishes include As-Machined, Bead Blasting, Anodizing, and Powder Coating. As-machined is the cheapest for internal parts, while bead blasting and anodizing are the gold standard for aluminum parts to achieve a professional, durable, and uniform appearance.
At Ranglink, we treat “As-Machined” as a specific choice, not a lack of choice. It leaves visible tool marks but keeps costs low. If you need something better looking, we go to Bead Blasting. It hides scratches and tool marks by hitting the surface with small glass beads. But be careful—blasting changes dimensions. I have seen ±0.02mm holes become ±0.05mm because the engineer didn’t ask us to mask the holes before blasting. We now use silicone plugs to protect tight tolerances⁸.
The Nuances of Anodizing
Anodizing⁹ is great for aluminum, but the alloy¹⁰ matters. 6061 takes color beautifully. 7075 often comes out looking yellowish or “splotchy” because of its high zinc content. If you must use 7075 for strength but need it to look good, I suggest choosing a dark color like black to hide the unevenness.
Powder Coating vs. Anodizing
Powder coating¹¹ is thick (60-100μm). It is excellent for outdoor gear because it resists corrosion¹². However, it fills in small details. If you have a laser-engraved logo or fine text, it will disappear under the paint. I recommend making any engraved text at least 0.3mm deep and 0.5mm wide if you plan to powder coat the part.
Mirror Polishing Challenges
Mirror polishing¹³ is our most expensive option. It requires manual labor and is very fragile. A single fingerprint can leave a mark. We usually advise adding a clear coat or plating over a mirror finish to protect it during shipping and assembly. Without protection, a mirror-finished part rarely stays a mirror for long.
How does surface finish impact your CNC machining costs?
Many designers think finish cost is about the price of the chemicals or the beads. In reality, the cost is driven by machine time and labor.
Surface finish costs scale based on the number of machining passes required. Moving from Ra 3.2 to Ra 0.4 can triple the cost because the machine must run slower with finer tools, often requiring secondary manual processes like hand-polishing or grinding.
To give you an idea, a simple 100mm aluminum plate might cost $30 as-machined. Adding a black anodized finish might bring that to $65. But if you want a mirror-polished finish at Ra 0.2, the price jumps to over $150. This is because the machine can’t do that work alone; a person has to spend hours polishing it by hand. Batch size also plays a huge role. Anodizing and plating shops have “minimum lot fees.” It might cost the same to finish 10 parts as it does to finish 1.
The Step-Change in Pricing
Cost does not grow in a straight line. It jumps in steps. Every time you ask for a smoother Ra, we have to add a “finishing pass.”
- Ra 3.2: One rough pass.
- Ra 1.6: One rough pass + one finish pass.
- Ra 0.4: Rough, semi-finish, finish, and potentially grinding¹⁴.
Each pass adds time, and time is money in a CNC shop.
Design Factors that Drive Up Prices
Deep holes, narrow slots, and blind holes are nightmares for finishing. Sandblasting media gets stuck in them. Anodizing acid can get trapped and cause corrosion later. If a specific hole does not need a finish, mark it as “Mask This Area” on your drawing. This saves us time on masking and saves you money on labor.
| Finish Type | Estimated Cost Increase | Best Use Case |
|---|---|---|
| As-Machined | Baseline ($) | Brackets, internal supports. |
| Bead Blast | +20-30% ($$) | Consumer electronics, matte looks. |
| Anodizing | +40-60% ($$$) | Aerospace, marine, decorative. |
| Mirror Polish | +200-500% ($$$$$) | High-end jewelry, medical, optics. |
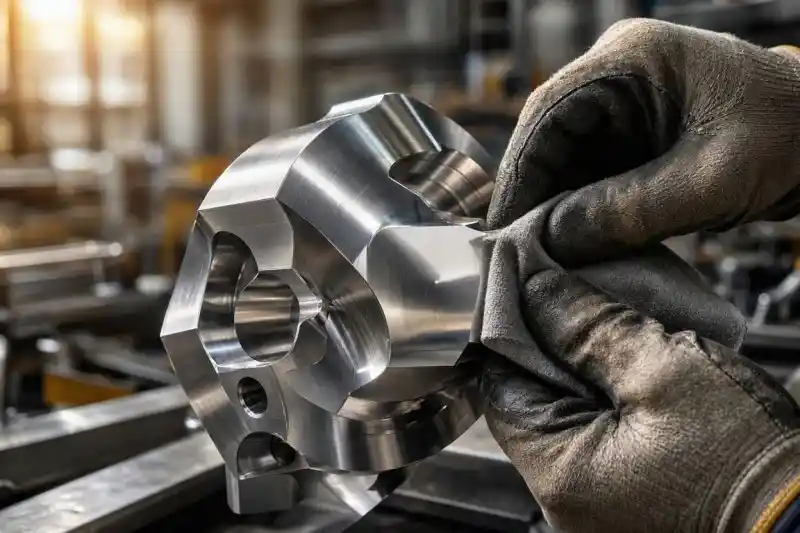
How to choose the right surface finish for your project?
Choosing a finish should follow a logical path to ensure you don’t waste money or compromise the part’s function.
To choose the right finish, prioritize function first, then aesthetics, and finally budget. Identify if the surface is for sealing, sliding, or display. Avoid mixing multiple finishes on one part unless absolutely necessary to keep lead times and costs manageable.
In my DFM¹⁵ reviews at Ranglink, I often see designs with four different finishes on one small part. One side is polished, another is ground, and the holes are masked. This part has to travel to three different sub-vendors. This adds two weeks to the lead time and doubles the price. I always suggest unifying the finish. If you can use one process for the whole part, do it. Use silk-screening instead of laser engraving if it saves a setup. Simple is always better.
Function Always Wins
If a part is for a vacuum system, don’t worry about how it looks. Focus on the seal. If it is a heat sink, anodizing might help or hurt depending on the color and thickness. Always tell your supplier what the part does. When I know the function, I can suggest a cheaper finish that works just as well.
The Value of Professional DFM
At Ranglink, we don’t just take your order. We look at your Ra specs and ask, “Why?” If we see a Ra 0.4 on a part that clearly doesn’t need it, we will tell you. My goal is to be an extension of your team. We want to help you get your product to market faster by removing unnecessary complexity.
Summary Selection Table
Use this table as a quick reference during your next design phase:
| Usage Goal | Recommended Finish | Key Benefit |
|---|---|---|
| Save Money | As-Machined (Ra 3.2) | Fast and functional. |
| Professional Look | Bead Blast + Anodize | Hides tool marks, adds color. |
| Prevent Wear | Hard Anodize / Electroless Nickel | Increases surface hardness. |
| Maximum Precision | Grinding / Lapping | Holds tightest tolerances. |
Conclusion
Surface finish is a balance of function, look, and cost. To get it right:
- Define the function first: sealing, sliding, or display.
- Use Ra 3.2 for internal parts, Ra 0.8-1.6 for visible surfaces.
- Mask tight-tolerance features before blasting or coating.
- Ask your supplier for DFM feedback before finalizing the drawing.
Ready to start your next project?
Whether you need high-precision batch production or expert advice on the best machining path, I am here to help.
Contact me today for a fast quote:
Email: info@ranglink.com
WhatsApp: Message us on WhatsApp
- Overview of Coordinate Measuring Machines (CMM) for precision inspection.
- Detailed explanation of the turning process on a lathe.
- Scientific standards and definitions for surface roughness.
- Overview of milling machining and multi-axis cutting processes.
- Physics of friction and resistance between moving surfaces.
- Engineering definition of material wear and degradation.
- Information on medical implants and biocompatibility standards.
- Guide to engineering tolerances and precision limits.
- Technical explanation of the anodizing process for protecting aluminum.
- Definition of metal alloys and their enhanced physical properties.
- Overview of powder coating methods for durable industrial finishes.
- Scientific explanation of corrosion and material oxidation.
- Information on polishing processes used to smooth and shine surfaces.
- Explanation of precision grinding for material removal and finishing.
- Principles of Design for Manufacturability (DFM) in product engineering.